

led pool light color changing instructions
Understanding LED Pool Light Color Changing Issues

Troubleshooting color mismatches and cycling lights is common with LED systems. Resetting‚ checking power‚ and verifying bulb voltage are initial steps for resolution.
Common Problems & Troubleshooting
LED pool lights experiencing color issues often stem from synchronization problems‚ where individual lights display differing hues while the rest maintain a consistent color. A frequent issue involves a single light rapidly cycling through various colors. Initial troubleshooting involves verifying the power source and inspecting the bulb’s voltage compatibility – ensuring it matches the system’s requirements. If problems persist‚ a manual power cycle‚ essentially a switch reset‚ can often resolve the issue. For more complex scenarios‚ examining the fixture for physical damage and checking wire connections at the junction box are crucial steps.

Initial Checks & Power Supply
Begin by confirming the power source is active and correctly connected. Then‚ inspect the bulb’s voltage to ensure compatibility with your pool light system.
Verifying Power Source
Start with a thorough check of the circuit breaker supplying power to the pool lights; ensure it hasn’t tripped. Next‚ inspect the transformer‚ verifying it’s receiving power and outputting the correct voltage. A multimeter is invaluable here – test the voltage at the transformer terminals. Confirm all connections are secure and free from corrosion. If using a remote or automation system‚ check its power supply and programming. Remember‚ inconsistent power is a frequent cause of LED color issues‚ leading to erratic behavior or complete failure. A stable power source is paramount for consistent performance.
Inspecting Bulb Voltage Compatibility
Crucially‚ verify the LED bulb’s voltage matches your pool’s transformer output. Two common voltages exist for pool lights; using an incompatible bulb can cause flickering‚ color distortions‚ or complete failure. Check the bulb’s labeling for its required voltage (typically 12V or 120V). Compare this to the transformer’s output voltage – often printed on the transformer itself. Incorrect voltage can also damage the bulb or the transformer. If unsure‚ consult the manufacturer’s specifications or a qualified electrician to ensure compatibility before proceeding with any further troubleshooting steps.
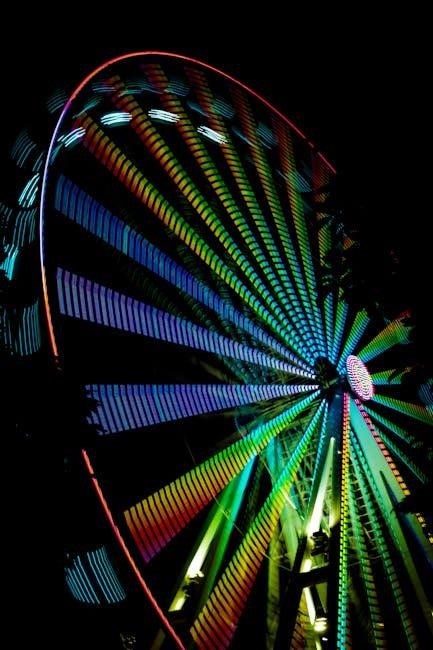
Color Synchronization Problems
LED lights sometimes lose synchronization‚ displaying mismatched colors. Resetting the system or manually power cycling often resolves these issues‚ restoring a unified color display.
LED Colors Out of Sync: Resetting Procedures
When LED pool lights display inconsistent colors‚ a reset is frequently the solution. Begin by turning off the power to the entire pool light system at the breaker. Then‚ power cycle each light individually – switch it off and on again. Following this‚ reactivate the main power and test the lights.
If issues persist‚ attempt a panel reset: press the light button on the control panel off and on‚ then on again. This can often resynchronize the lights. For stubborn cases‚ a factory reset might be necessary‚ but consult the manufacturer’s instructions first‚ as procedures vary.
Manual Power Cycling (Switch Reset Method)
The manual power cycling‚ or switch reset method‚ is a straightforward troubleshooting step. Locate the physical switch controlling the pool light – often at the junction box or breaker panel. Turn the switch completely off for approximately 30 seconds to fully discharge any residual power.
Then‚ firmly switch it back on. This process effectively “reboots” the light’s internal controller. Observe if the color synchronization improves. Repeat this process for each individual light if only some are affected. This simple reset can resolve minor software glitches causing color discrepancies.
Advanced Troubleshooting Steps
Examining the fixture for physical damage and checking wire connections at the junction box are crucial if basic resets fail to correct color issues.
Examining the Fixture for Damage
Carefully inspect the entire LED pool light fixture for any visible signs of damage. Look for cracks in the housing‚ particularly around the lens and seals‚ as water intrusion can cause malfunctions. Check the wiring within the fixture itself‚ if accessible‚ for corrosion or loose connections. A damaged fixture can lead to inconsistent color output or complete failure. Ensure the light is completely disconnected from power before any physical inspection. Pay close attention to any discoloration or burning smells‚ which indicate potential electrical issues requiring professional attention. Remember safety first!
Checking Wire Connections at the Junction Box
Safety is paramount – always disconnect power before inspecting the junction box. Carefully examine all wire connections for corrosion‚ looseness‚ or damage. Ensure wire nuts are securely fastened and that no bare wires are exposed. Water intrusion is a common culprit‚ so look for signs of moisture within the box. Verify the wires are properly connected to the correct terminals‚ matching the light’s wiring diagram. A poor connection can disrupt the signal‚ causing color issues or complete light failure. Tighten any loose connections and replace corroded wiring as needed.
Factory Resetting LED Pool Lights
Resetting to factory defaults resolves stubborn color or mode issues‚ especially when changing settings. This process often involves power cycling the system repeatedly;
When a Factory Default Reset is Needed
A factory reset becomes crucial when standard troubleshooting fails to correct persistent color synchronization problems or erratic light behavior. If lights cycle through colors independently‚ or refuse to maintain a chosen setting‚ a reset is often the solution; This is particularly relevant after attempting to change light modes or settings without success. Consider a reset if lights don’t respond to normal control panel commands. It effectively clears the light’s memory‚ returning it to its original programmed state‚ allowing for a fresh configuration. Remember to document existing settings before resetting‚ as this action will erase them.
Resetting for Changing Light Settings
Before attempting significant alterations to your LED pool light’s programming‚ a reset can streamline the process and prevent conflicts. If you’re introducing new color schemes or dynamic modes‚ clearing the existing memory ensures a clean slate for the new settings. This is especially useful if previous customizations are causing unexpected behavior; Following a reset‚ the light will revert to its factory defaults‚ allowing you to precisely define your desired ambiance. Remember to consult your light’s manual for specific reset procedures‚ as methods can vary between manufacturers and models.
Thermal Protection & Overheating
LED lights utilize thermal protection to prevent damage from overheating; dimming indicates this feature is active‚ potentially impacting color consistency and functionality.
Understanding Thermal Protection Features
LED pool lights often incorporate thermal protection to safeguard against overheating‚ a common issue that can diminish bulb lifespan and affect color output. This safety mechanism‚ like Colorlogic‚ actively monitors the light’s temperature. When excessive heat is detected‚ the system intelligently dims the LED‚ reducing operational stress. This isn’t a malfunction‚ but a preventative measure. Consistent dimming suggests inadequate water circulation or a faulty fixture. Addressing these underlying causes is crucial for optimal performance and preventing premature failure‚ ensuring vibrant and reliable pool illumination. Proper maintenance and ensuring adequate cooling are key.
Addressing Overheating Issues
If your LED pool light frequently activates thermal protection and dims‚ investigate potential causes immediately. Insufficient water circulation is a primary suspect; ensure your pool’s pump and filter system are functioning optimally. Check for obstructions hindering water flow around the light fixture. A malfunctioning light fixture itself can also contribute to overheating. Inspect for damage or corrosion. If dimming persists despite adequate circulation‚ consider a fixture replacement. Prioritizing proper cooling prevents long-term damage and maintains consistent‚ vibrant color performance‚ extending the life of your LED investment.
Warranty Considerations
Check your LED pool light’s warranty status before attempting repairs. Contact the manufacturer for assistance if the lights are still covered.
Checking Warranty Status
Before diving into extensive troubleshooting for your color-changing LED pool lights‚ determining the warranty status is crucial. Many manufacturers offer warranties covering defects in materials and workmanship‚ potentially saving you repair costs. Locate your original purchase receipt or warranty documentation to ascertain the coverage period. Note the purchase date‚ as warranties typically have a limited timeframe.
If you’re unsure about the warranty details‚ the manufacturer’s website often provides information or a contact number for warranty inquiries. Knowing your warranty status will guide your next steps – whether to attempt a fix yourself or seek professional assistance under warranty.
Contacting the Manufacturer
If your LED pool lights are under warranty and troubleshooting steps haven’t resolved the color-changing issues‚ contacting the manufacturer is the next logical step; Locate their official website or customer support number – often found on the product packaging or warranty documentation. Prepare to provide details about your purchase‚ the specific problem you’re experiencing‚ and any troubleshooting already attempted.
Be ready to potentially provide photos or videos demonstrating the malfunction. A clear description of the issue will expedite the support process and help them determine the best course of action‚ whether it’s repair‚ replacement‚ or further guidance.

Upgrading to LED Technology
Switching to LED pool lights offers cooler operation‚ reduced energy consumption‚ and enhanced color capabilities‚ resolving many traditional lighting problems efficiently.
Benefits of LED Pool Lights
LED pool lights represent a significant advancement over traditional halogen or incandescent options. Their primary benefit lies in dramatically reduced energy consumption‚ translating to lower electricity bills for pool owners. Furthermore‚ LEDs operate much cooler‚ minimizing the risk of overheating and extending the lifespan of both the bulb and surrounding components.
Beyond efficiency‚ LEDs offer a wider spectrum of vibrant color options and enhanced control through color-changing capabilities. This allows for customizable pool ambiances and dynamic lighting displays. The durability and longevity of LEDs also reduce the frequency of bulb replacements‚ saving time and money in the long run.
Energy Efficiency & Cooler Operation
LED pool lights excel in energy conservation‚ using significantly less power than traditional lighting methods. This reduction in wattage directly impacts your energy bill‚ offering substantial savings over time. Crucially‚ LEDs generate considerably less heat during operation. This cooler running temperature minimizes the potential for damage to the fixture‚ wiring‚ and even the pool liner itself.
The decreased heat also contributes to a longer bulb lifespan‚ reducing replacement frequency and associated costs. This combination of efficiency and thermal management makes LEDs a smart and sustainable choice for pool illumination‚ enhancing both enjoyment and cost-effectiveness.
Specific Issue: Cycling Through Colors
A single light rapidly changing colors often indicates a malfunction; check for mismatches in color modes or a failing LED unit requiring replacement.
Diagnosing a Single Light Malfunction
When one LED pool light cycles through colors independently‚ a systematic approach is crucial. Begin by isolating the problematic light; does it respond to remote commands at all? If so‚ attempt a reset – a manual power cycle (switching the breaker off and on) can sometimes resolve temporary glitches. If the issue persists‚ carefully inspect the fixture itself for any visible damage‚ like cracks or water intrusion. A multimeter is invaluable here; testing voltage at the junction box will confirm if the light is receiving adequate power. If voltage is correct‚ the light itself is likely faulty and may require replacement under warranty.
Troubleshooting Color Mode Mismatches
Color synchronization issues are frequently addressed through resetting the LED system. Start by pressing the light button on the control panel repeatedly – off and then on again – to initiate a resync. If this fails‚ a full power cycle‚ turning off the breaker supplying the lights for a short period‚ can force a reset. Confirm all connections are secure at the junction box. If mismatches continue‚ individual lights might be defective‚ necessitating further diagnosis with a multimeter to verify proper voltage delivery. Consider a factory reset as a last resort‚ following manufacturer instructions.
Using a Multimeter for Diagnosis
Locate the pool light junction box and carefully test the voltage at the connection point to ensure proper power delivery to each light.
Locating the Pool Light Junction Box
The pool light junction box is typically found near the pool equipment‚ often alongside the pump and filter systems. It’s a weatherproof box where the low-voltage wiring from the pool lights connects to the main power supply transformer. Look for a gray or beige plastic box‚ sometimes partially buried or mounted on a wall.
Carefully inspect around the equipment pad‚ following the conduit or wiring that leads to your pool lights. Safety first – always turn off power to the pool equipment before opening the junction box. Identifying this box is crucial for voltage testing and troubleshooting color synchronization issues with your LED lights.
Testing Voltage at the Connection Point
With the power safely switched off at the breaker‚ access the wiring connections within the junction box. Using a multimeter set to the appropriate AC voltage range‚ carefully test the voltage between the wires connected to the pool light circuit. You should typically read around 12 volts AC‚ but this can vary.
Ensure proper grounding and avoid touching any bare wires. A lack of voltage‚ or a significantly different reading‚ indicates a problem with the transformer or wiring‚ potentially causing the color changing issues. Document your readings for comparison and potential troubleshooting with a qualified electrician.